The other day, I found myself repairing someone's rather painful failed repair.
The client had a defective Joy-Con for their child's Nintendo Switch, and it seemed that the battery had failed.
Also: Why you need a batteryless jump starter (and how it works)
Rather than buy a new Joy-Con, they decided it would make a decent repair project and bought replacement batteries. These Nintendo joycons are quite easy to open and the battery easy to replace, so it is a good repair project.
The repair seemed to go well; but after refitting the battery, the Joy-Con still didn't work. It was dead and wouldn't seem to charge up, so they went back in, started poking around, and then things took a serious turn: They accidentally broke the little fastener that connects the battery to the Joy-Con.
This is where I came in. I assured the client that things like this happen, that the broken connector could be fixed with a bit of soldering, and that the problem with the "new" battery was that it was so completely discharged, it wouldn't charge up when connected to the Nintendo Switch.
Also: How to solder: Tools, tips, and tricks to get you started the easy way
But the underlying issue here is simple -- and quite common: You can't fully trust "new" parts to be working properly. The most common repair that people start out with is a battery swap; whenever possible, I test batteries before fitting them, because having to open something up a second time to get at the battery increases your risk of breaking something.
Batteries are easy to test: all you need is a multimeter set to read DC volts, and you touch the red lead to the red wire or the one marked as positive (+), the black lead to the black wire or the one marked as negative (-) and compare the reading on the screen to the rated voltage on the battery.
Also: The best rechargeable batteries you can buy
The Joy-Con has a single-cell lithium ion battery with a voltage of 3.7 volts. Fully charged, these hit a high of around 4.2 volts, and fully discharged can be below 3.3 volts (you can find these numbers for different batteries with a quick search of the internet). For some reason the replacement battery had drained to below 3.3 volts and so it wouldn't charge.
Testing a rechargeable battery
It's a super quick test.
I now make a habit of testing all rechargeable batteries before fitting, because I too have fitted a defective battery into a device, and was left scratching my head as to what was the matter.
Also: This $10 gadget is my favorite repair tool of all time
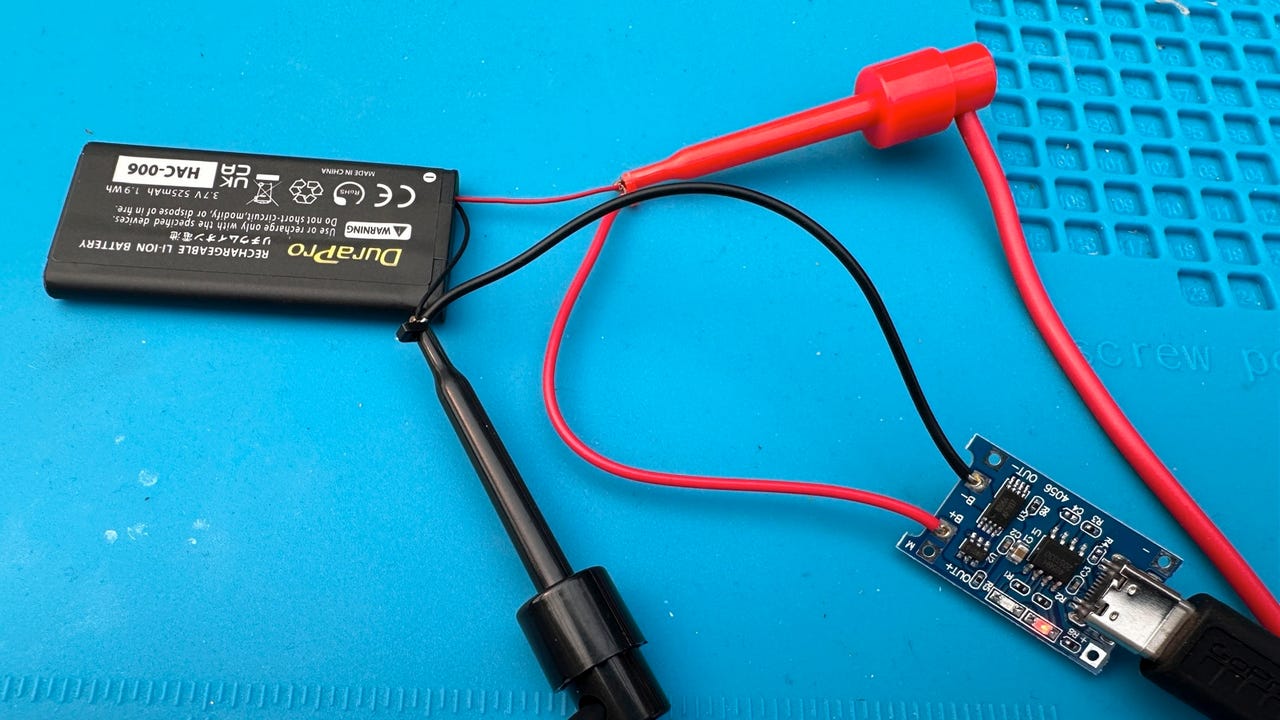
I have a trick up my sleeve, in the form of a little TP4056 charging board.
TP4056 charging board
This board is designed for charging single-cell lithium ion batteries -- you connect the battery leads to the module (I used clips), connect USB power to the module, and wait for it to charge the battery.
This brought the Joy-Con battery to full charge, and it has been working fine since.
Bringing a discharged lithium ion battery back to life with a TP4056 charging board
You can get these charging boards for USB-C and microUSB, they're cheap -- you can buy five for only $6 -- and they're great for charging single-cell lithium ion batteries outside of the device they're supposed to be in.
Also: You'll never guess how many tech repair tools this little bag can fit
Need a multimeter? I really like the Pokit Pro that connects to a smartphone, but if you're starting out, you can pick up a good multimeter for $12.
"gadget" - Google News
May 23, 2023 at 09:02PM
https://ift.tt/BTCEyDc
Dead gadget battery? This $6 tool is a must-have for tech repairs - ZDNet
"gadget" - Google News
https://ift.tt/Qw8ZCKO
Bagikan Berita Ini


0 Response to "Dead gadget battery? This $6 tool is a must-have for tech repairs - ZDNet"
Post a Comment